
Docs › Studio › Studio on your computer
Getting started with Studio on your computer
PriorStates Studio on your computer is where you and your AI make apps, run them, and keep improving them. You say what you need; the AI writes the app on this computer; it opens right here, with your files, folders and Python within reach. Every change is saved first, so Undo always puts it back.
Install and open it
Download Studio for your computer from priorstates.com/hub.html (Windows, macOS, Linux). Open PriorStates Studio. It keeps running in the system tray when you close the window, so your apps, services and reminders keep working; use Quit in the tray to stop it.
You can use Studio in its own window, or in your browser at the address the window shows
(http://127.0.0.1:<port>/desk/). A few things are only in the window: Phone (pairing your phone),
Settings → This computer and Settings → Log.
Which AI builds your apps
You can start right away with the free starter AI, which is limited per day. You don't need a key or an account.
When you want more, you have two choices:
- Your AI subscription. If you have Claude Pro or Max, or ChatGPT Plus or Pro, the window asks Which AI subscription do you have? Pick yours, and Studio installs the maker's own coding agent and opens its sign-in page. There's nothing extra to pay.
- Your own API key. Open Settings → Use your own API key, choose the service (Google, Anthropic, OpenAI-style services and others), paste the key and press Save. Then press Test to check it.
See Settings and your AI for details.
The first screen
On the left is the rail:
- Spaces, with your spaces under it. The first one is My apps.
- Apps
- Services
- Phone (in the window)
- Settings
- About
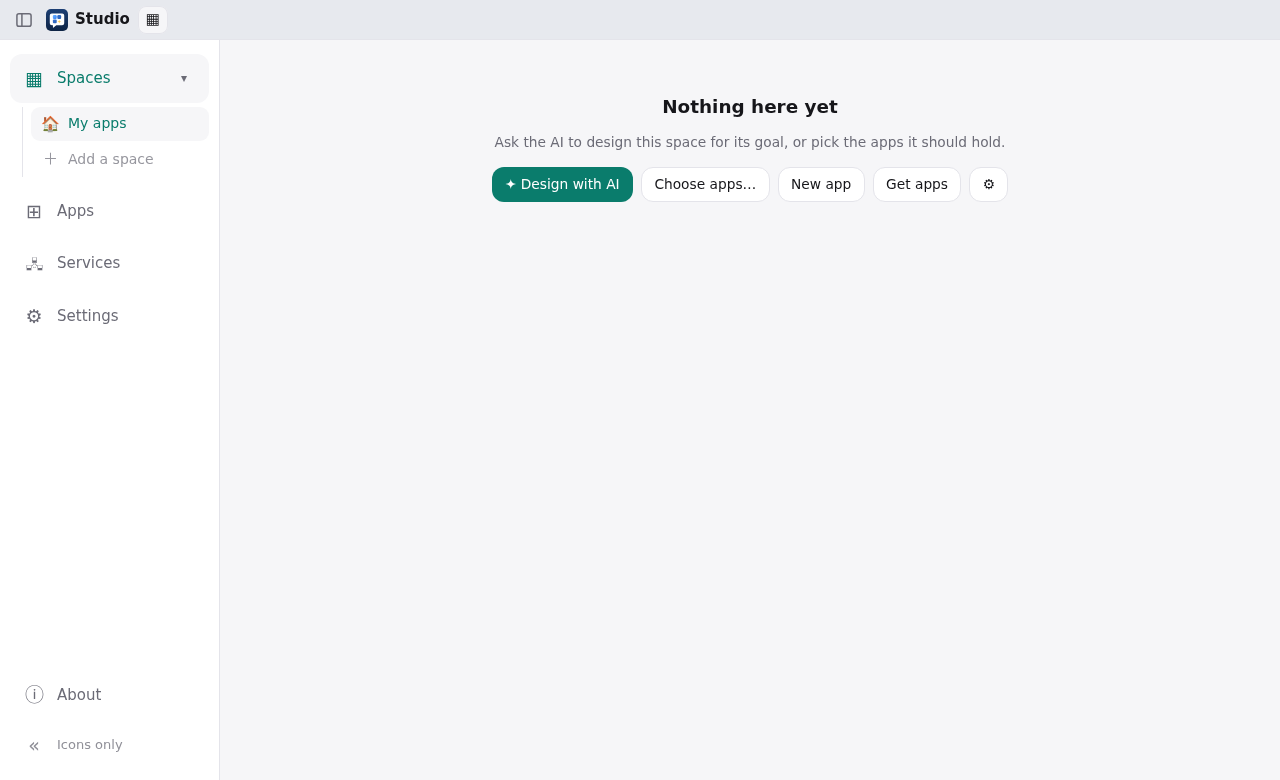
A new space says Nothing here yet and offers four buttons:
- ✦ Design with AI: tell the AI what the space is for, and it proposes the apps.
- Choose apps…: pick apps you already have.
- New app: describe one, and the AI builds it.
- Get apps: install ready-made apps from the Gallery.
The First steps card walks you through the basics, ticking each step as you do it:
- Make your first app.
- Change it by asking.
- Get an app from the Gallery.
- Connect your phone.
Make your first app
Press New app. A new tab opens with Build beside an empty preview.
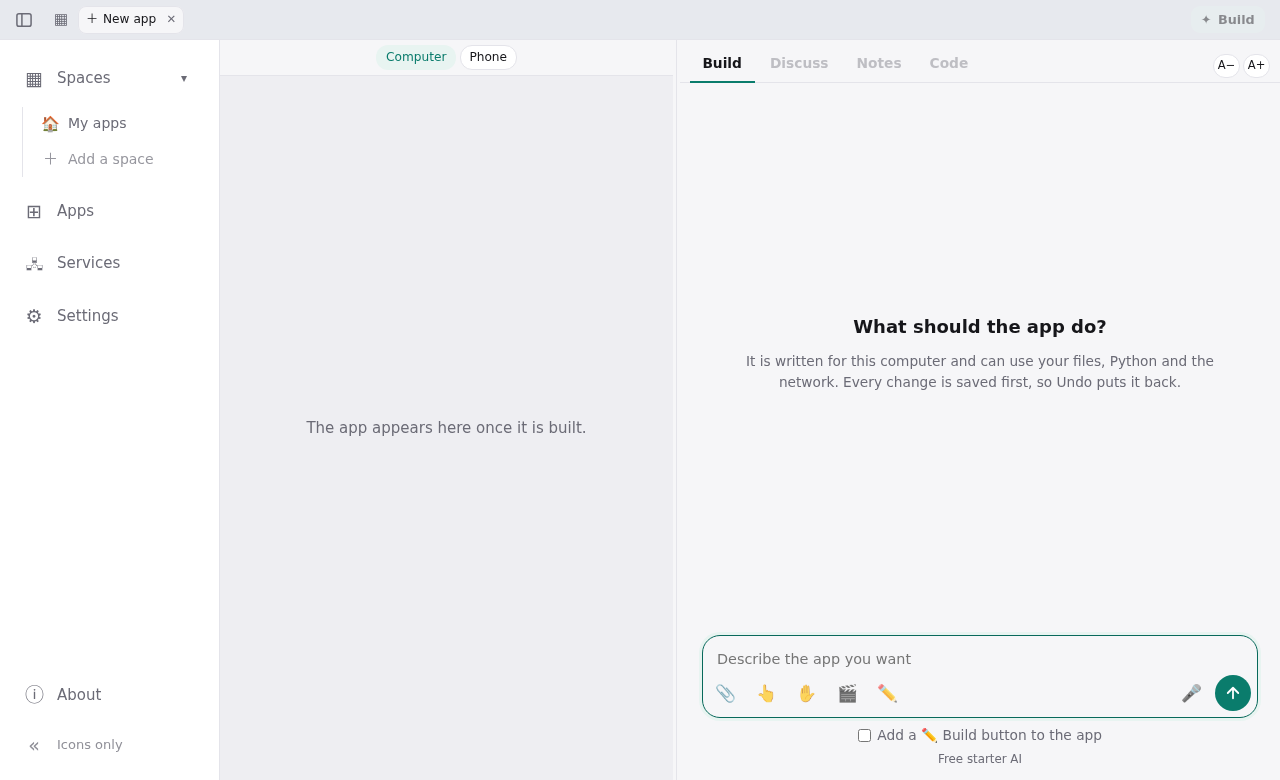
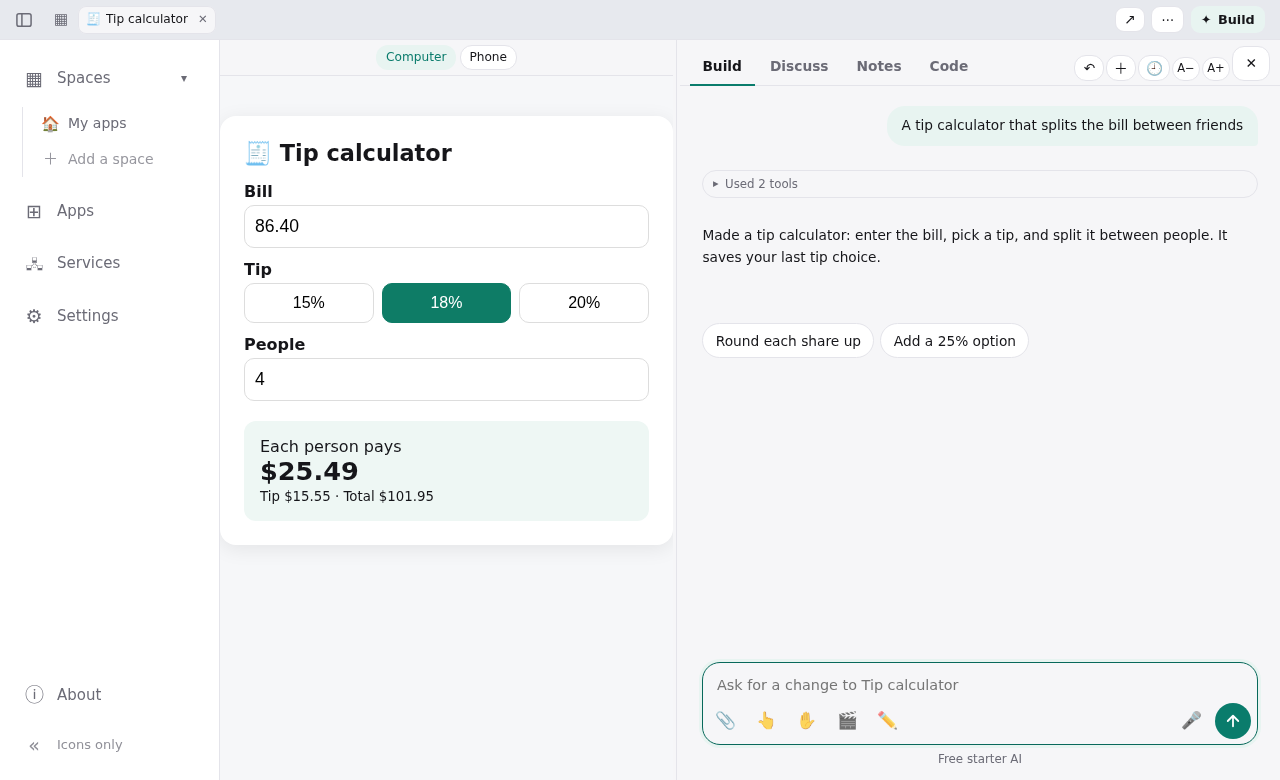
The new app's Build: say what the app should do In the box (Describe the app you want), say what it should do, in your own words. For example: A tip calculator that splits the bill between friends.
Press Enter. The AI writes the app, and you see its steps as it works. A few moments later the app appears on the left, ready to use.
To change it, just ask: Make the total bigger, Add a 15% / 18% / 20% choice. Every change can be undone with ↶.
What else you can do while building is in Making and changing apps: attach files, point at the app, draw, and show a problem.
Where to go next
- Spaces: arrange your apps for a project, a business or a part of your day.
- Discuss, Notes and Code: talk an app through without changing it, keep facts the AI should know, and see how it is made.
- Services and public addresses: run an app's backend on your own servers, and give it a public address.
- Your phone, other computers and teams.